Now more than ever, it’s easier and cheaper to host your own personal website. I’ll list out what I used and how I build this site.
Hugo - Static Site Framework
I’m a huge fan of static sites for most general purpose websites, they load quickly and are easy to maintain.
I’ve been using Hugo as my static site framework since I’m a fan of Go and their extensive theme library.
Hugo has the fastest build time of any static site framework at the time of writing this post, this is really useful for when you need to do more than the average blog post.
Other notable options out there are Jekyll and Gatsby.
I suggest keeping track of this project with a Git solution like Github.
Render - Hosting
After we’ve built our website, we will need to host it and make it accessible on the internet.
I’ve gone with Render as my hosting service for my site. Render offers a free tier for hosting static sites which comes with 100 GB/month bandwidth and continuous deploys based on changes in Git.
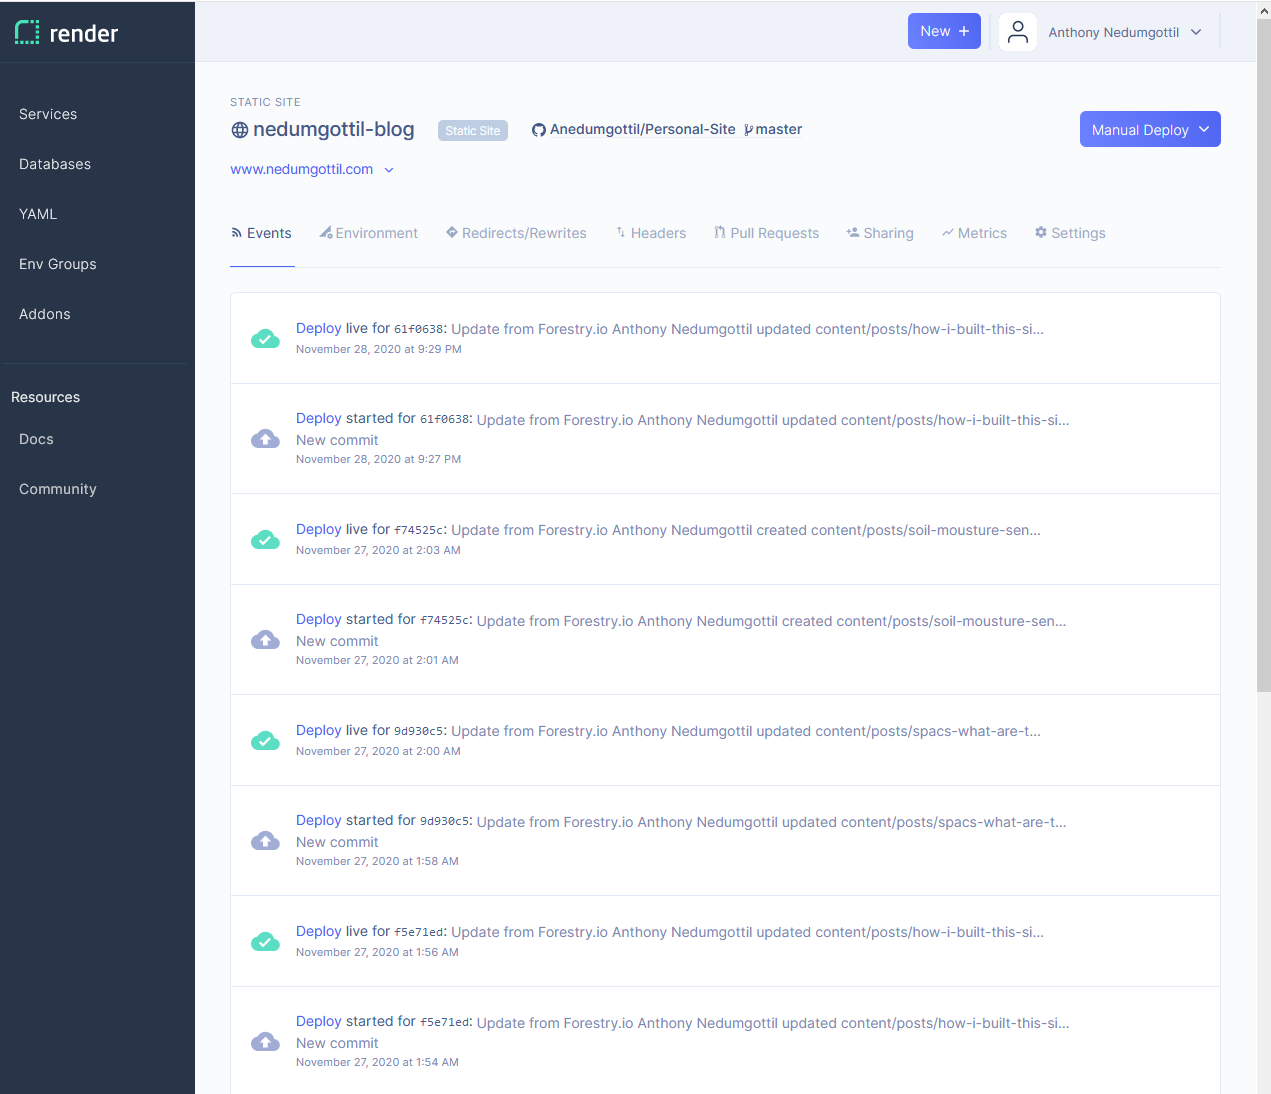
As you can see in the screenshot, every change I commit to the upstream git repo triggers a rebuild and deploy of the site.
Here is my build command for this site, you can configure this in the settings tab:
yarn install && hugo --gc --minify
After your site successfully deploys, you can go into the settings under Custom Domains to find your site. it should follow the https://.onrender.com pattern.
Forestry & Headless CMS
Think of a Headless CMS as an admin-zone where you can manage all of the static content on your site.
We don’t need to be coupled to WordPress and PHP with the rise of Headless CMS solutions, we can swap between CMS and front-end tempting solutions as we please.
I have found Forestry.io to be pretty compelling with it’s very straight forward and easy to use UI.
All you need to do is connect this to your Git repo and you’re ready to edit your site’s content.
I’m writing this through Forestry right now.